Metal Siding Panels for Texas Steel Workshops: How to Choose

Choosing metal siding panels for a Texas steel workshop starts with the building’s job, not a color chip. Panel profile, finish, attachment, openings, water management, and structural design all influence whether an exterior suits the project. A farm shop, fleet repair facility, and hobby workshop may share a steel frame, but their access patterns, exposure, interior conditions, and appearance priorities can differ. This guide lays out a practical way to compare options and prepare a clear scope.
What should you decide before comparing metal siding panels?
Begin by defining what the workshop must support. Siding is only one part of the building, yet choices made at the wall surface affect trim, openings, maintenance access, and future changes. A short written brief keeps the conversation grounded in the actual site.
Record the following before asking for a panel recommendation:
- Building use:
Describe whether the space is for vehicle storage, equipment maintenance, fabrication, agricultural work, inventory, or a mix. Note whether people will spend full workdays inside or use it occasionally.
- Movement and impacts:
Identify where tractors, trailers, forklifts, deliveries, and people enter or pass. A busy work wall deserves different planning from an elevation with no regular activity.
- Interior environment:
State whether the building will remain unconditioned or receive heat, cooling, insulation, or interior lining. Siding alone does not deliver a complete thermal or moisture-control assembly.
- Openings and equipment:
Mark overhead doors, walk doors, windows, vents, exhaust outlets, electrical entries, and planned equipment. A late opening can require panel cuts and revised flashing details.
- Appearance:
Consider how the workshop relates to a home, farmstead, business frontage, or neighboring buildings. Color, panel direction, roof finish, and trim all contribute to the overall effect.
- Site exposure:
Note prevailing rain exposure, roof runoff, shade, vegetation, airborne debris, chemical use, and any coastal influence. Conditions can vary greatly across Texas.
- Future changes:
List likely expansions, added doors, equipment penetrations, or changes in use. Even if those changes are not part of the first phase, reserve space and document the assumption.
These notes are project inputs, not engineering conclusions. A qualified building team coordinates panel selection with framing, openings, applicable design requirements, and site conditions. For a wider view of a coordinated project, review the custom metal buildings service information.
A useful first exercise is to sketch each wall and label its purpose. The wall behind a workbench may need convenient access for utilities, while the wall facing the driveway may carry the primary overhead door and receive more weather. This simple elevation sketch can reveal where full panel runs are interrupted and where additional trim, framing coordination, or splash protection should be discussed.
Which metal siding panel profiles should you compare?
Profiles describe the shape and connection geometry of a panel. Ribs, flats, seams, and overlaps affect appearance and how the panel attaches, but product names differ between manufacturers. Compare actual product data and installation details instead of relying on labels such as “standard” or “premium.” A practical first distinction is exposed-fastener versus concealed-fastener systems.
What does an exposed-fastener panel involve?
An exposed-fastener panel is attached through its face with screws and washers. The fastener pattern remains visible and becomes part of the elevation’s look. Ribbed shapes are common on utility, agricultural, and workshop buildings because they create a familiar linear appearance and a direct attachment approach.
The system’s weather performance depends on more than the broad panel surface. Ask how the selected product handles side laps, end laps where applicable, corners, eaves, rake edges, openings, and penetrations. Fastener type, placement, washer compression, and installation method should follow the applicable product instructions. An overdriven or underdriven fastener can create a problem even when the panel itself is appropriate.
For maintenance planning, ask which fasteners and washers are specified, how they should be inspected, and what repair method is approved. Do not assume that a screw from a hardware shelf or an arbitrary sealant is interchangeable with the system components. Keep the product and finish information with the building records.
What is different about concealed-fastener panels?
Concealed-fastener systems hide most attachment points beneath panel edges or clips. The result can be a cleaner, less interrupted wall face. The system may involve different clips, substrate requirements, installation steps, and cost than a face-fastened panel. It is not automatically the right choice for every workshop; its value depends on the desired appearance, project design, product availability, and installation scope.
Ask how the specific system is attached and what happens at corners, terminations, windows, and doors. Confirm whether the wall framing and support spacing suit the product, how movement is accommodated if relevant to that system, and whether replacement panels can be removed without disturbing a large area. Ask the supplier or installer to explain the repair process before choosing a system based only on a smooth appearance.
How should panel direction and layout be planned?
Vertical wall panels are a common choice. Their lines can suit workshop elevations, and the layout can be coordinated with downward water shedding. Some products and designs permit other orientations, but no arrangement should be assumed without checking the product and project details.
Review the elevation with actual openings drawn to scale. A wide overhead door can leave narrow strips of panel at either side or above the opening. Those pieces may affect the visual balance and the way trim is arranged. If several doors are close together, planning the panel module and trim early can reduce awkward slivers and make the finished wall more coherent.
Ask for a simple elevation or panel layout showing corners, openings, and transitions. It does not replace construction documents, but it is a useful coordination check. Confirm that the planned orientation, support locations, fasteners, and trim work as one system.
How do coating, substrate, and color affect the choice?
The visible finish is only part of the material specification. The metal substrate and coating work together, and their suitability depends on the product and exposure. Ask the supplier or contractor to identify what will actually be supplied: panel material, finish system, color, relevant documentation, warranty terms, and care instructions.
Compare proposals using specific questions rather than broad promises:
- What is the named finish?
Request the manufacturer’s product information and make sure the quote identifies the finish rather than simply saying “painted metal.”
- What exposure is suitable?
Ask whether the product is appropriate for the project’s location and conditions. Coastal air, persistent moisture, industrial fumes, or contact with certain materials may call for specific review.
- What does the warranty cover?
Read the actual terms, including covered conditions, duration, exclusions, maintenance obligations, and required installation practices. A warranty is not a promise that the wall needs no inspection or care.
- How is damage addressed?
Ask about approved touch-up products, cleaning methods, and matching replacement materials. Color matching can be affected by age and weathering.
- Are components compatible?
Check whether fasteners, trim, closures, and accessories are specified for the panel and exposure, rather than assembled from unrelated products.
Color selection is best made with a physical sample viewed outdoors. Light, shade, surrounding trees, and neighboring finishes can change how a color appears compared with a screen. A dark color may create a bold, compact look; a lighter color can make a long wall feel less visually heavy. Neither is universally better. Think about what will be seen from the drive, road, home, or work area, and consider how dust, scratches, and repairs may show.
Coordinate the siding color with the roof and trim. A workshop with a large overhead door may have three or more prominent exterior finishes. Too many competing colors can make the wall feel busy; a restrained palette can help the building sit naturally on the property. Use samples of all major finishes together, not one isolated swatch.
Texas is not one exposure condition. A site near the Gulf may face different air and moisture conditions from an inland site. Trees can keep one wall shaded and slow drying; roof runoff or irrigation can repeatedly wet another. Discuss the actual site and intended use with the supplier or design team. Structural design, connections, and local requirements also need project-specific confirmation.
What should Texas weather and site conditions change?
Rain, wind, sun, humidity, and ground conditions affect the complete building envelope. Panels cannot make up for poor drainage or incomplete flashing. Review how water moves from the roof, across transitions and openings, and away from the wall base before the siding package is finalized.
How does roof runoff meet the wall?
Start at the roof edge. Confirm where runoff travels, whether gutters or other collection are part of the design, and how eaves and rake edges are finished. Ask what happens where roof and wall planes meet and how the selected trim keeps the assembly consistent. The answer depends on the roof and wall system; avoid assuming one generic detail applies to every building.
Walk around the proposed building footprint and look for areas where roof water may land near doors, walkways, equipment, or a neighboring structure. If the site plan routes water toward a wall, discuss grading or drainage corrections rather than relying on siding sealant as a solution. Water management should be planned at site level and at the building envelope together.
What should you check around doors and windows?
Openings interrupt the continuous panel field. Door and window frames need coordinated framing, trim, and flashing details, with particular attention to the top and sides where water can enter. Large shop doors deserve early review because their width and height affect framing, panel cuts, trim, and clearances.
List each opening by type, approximate size, and intended use. For an overhead door, record the vehicle or equipment that must pass through and any clearance needs. For a window, note whether daylight, sightlines, or ventilation matter. Then ask how each opening appears in the elevation and how the water-shedding details are handled. For more on coordinating access, see this guide to metal building door types and planning.
Why does the wall base matter?
The siding termination must be coordinated with slab edge, grade, and drainage. Soil, mulch, vegetation, or stored materials should not be allowed to trap moisture against the wall or obstruct intended drainage paths. Ask where the panel ends relative to the finished grade and how the base detail is protected.
Compare the planned slab elevation with the surrounding site and the approach to doors. A slab that works for interior use still needs to fit the overall grading plan. The concrete and sitework scope belongs in the same planning conversation as the wall system. The concrete slabs and sitework information explains why preparation and foundation planning are connected to the building shell.
How should penetrations and wind design be handled?
Plan vents, exhaust, electrical entries, plumbing, and equipment connections before panels are installed whenever possible. A planned opening can be coordinated with framing and flashing; a later field cut may require a separate repair detail. Keep a marked plan of every penetration and identify who is responsible for supplying and sealing each component.
Wind design applies to the building system, not to a panel profile in isolation. Confirm that structural design and connections address applicable local conditions and project requirements. Do not treat a panel label or generic rating as proof that the whole building is suitable for a particular site. The design professional and building team should establish the applicable criteria.
How should you compare panels for different workshop uses?
There is no single best profile for every steel workshop. Use the table as a discussion guide, then verify the particular product and project details with the supplier or contractor.
Option or priority | Potential fit | Questions to resolve |
Exposed-fastener ribbed panel | Workshop or utility elevation where a familiar ribbed appearance and direct attachment suit the design | Which fasteners and washers are specified? How are laps, edges, and maintenance addressed? |
Concealed-fastener system | Project where a less interrupted wall face is an important design priority | What clips and supports are required? How are repairs and replacement handled? |
Finish selected for demanding exposure | Site where coastal influence, persistent wetting, or other exposure needs careful material review | What does manufacturer documentation say about this condition, and what warranty terms apply? |
Color and layout coordination | Building where road-facing appearance, neighboring structures, or multiple openings shape the elevation | Have samples been viewed outdoors with roof, trim, and door finishes? |
Conditioned workshop assembly | Space intended for regular work, heating, or cooling | What insulation, ventilation, air, and moisture-control details are included beyond the cladding? |
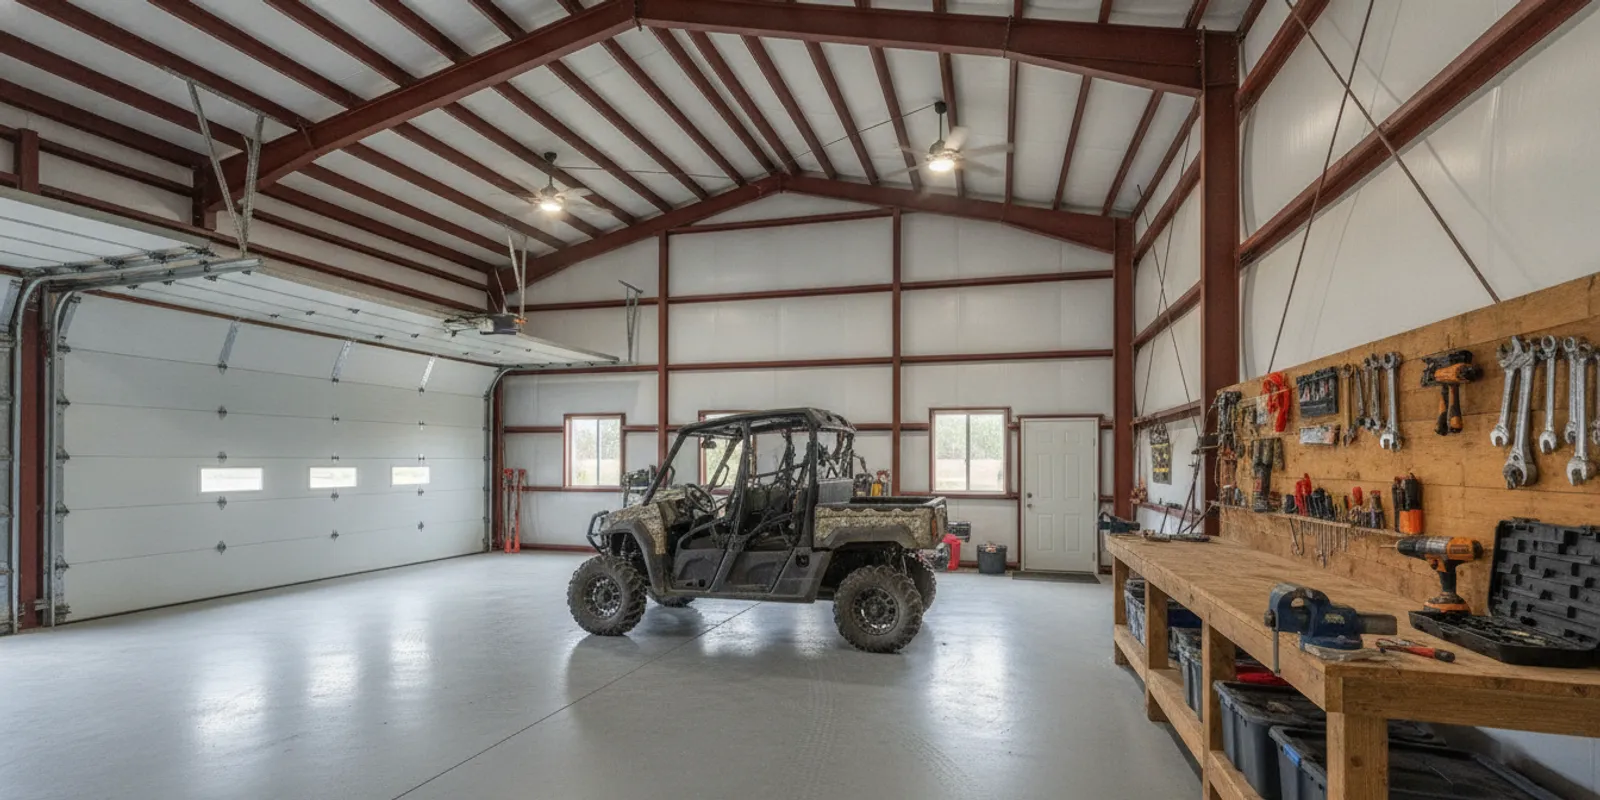
Consider three practical examples. A farm equipment shop may prioritize a straightforward exterior, durable detailing at traffic areas, and easy access for large equipment. The owner should identify the routes where impacts are plausible and ask whether those walls need protection or a different layout. The panel choice still needs to follow the structural and product requirements.
A customer-facing repair shop may care more about the appearance of the front elevation. Concealed fasteners might be worth comparing if the smoother look fits the building and budget, but the decision should include the system’s components, installation requirements, and repair method. A visually clean face is useful only if the complete assembly is appropriate.
A workshop with regular heating or cooling has another layer of decisions. The siding is not insulation, and the wall assembly must be considered with the roof, air movement, vapor control, and planned interior finish. Identify these needs before the shell is detailed. Adding a generic insulation layer after the panels are selected may not resolve condensation or comfort concerns.
How do insulation and condensation fit into panel selection?
Metal siding is exterior cladding, not a complete thermal or moisture-control system. If the workshop will be conditioned, discuss the whole envelope with the design and construction team. The right assembly depends on intended use, local conditions, ventilation, and the project specifications.
Describe how the space will operate. A storage building used intermittently may have different comfort expectations from a fabrication shop occupied for long workdays. A business storing materials with temperature or humidity sensitivities may need additional planning. Explain whether heating or cooling is expected, how often it will run, and what interior finish is planned.
Then ask what components are actually included. Clarify whether insulation is part of the proposal, its type and location, and how the roof, wall, slab edge, doors, windows, and penetrations are coordinated. Ask who is responsible for ventilation and any moisture-control details. Keep the answer tied to the designed assembly rather than a generic statement that “insulation is included.”
One useful way to compare proposals is to make a simple scope matrix. List roof insulation, wall insulation, interior liner, ventilation, openings, and air sealing as separate rows. Mark each as included, excluded, or pending design. That avoids assuming the word “insulated” means the same thing in two different estimates.
What maintenance should you expect from metal siding?
Metal siding can be a practical exterior, but no finish should be treated as maintenance-free. Follow the manufacturer’s care instructions and the terms of the supplied finish. A regular visual review and a walk-around after severe weather can help identify visible issues while they are manageable.
- Look for impact or surface damage.
Check near vehicle routes, doors, stored equipment, and lower wall areas for dents, punctures, scratches, or displaced panels. Record the location and take a photo before attempting a repair.
- Review exposed fasteners where applicable.
Look for signs of damaged or loose fasteners and deteriorated washers. Do not tighten or replace components without following the product’s approved procedure.
- Check joints and trim.
Inspect corners, opening trim, roof transitions, and penetrations for visible separation or damage. If water entry is suspected, document where it appears inside and outside.
- Keep drainage paths clear.
Look at roof edges, gutters if present, downspouts, grade, and places where water collects near the wall. Remove debris that prevents water from moving as intended.
- Remove debris carefully.
Leaves, soil, or other material that stays against the wall can hold moisture. Use only cleaning products and methods the manufacturer permits.
- Keep a repair record.
Save panel identification, finish details, warranty information, and photographs. Those records can help with future repairs or matching materials.
Do not improvise with incompatible cleaners, sealants, coatings, or touch-up paint. Ask the installer or manufacturer which products are approved for the specific panel. A scrape, a loose fastener, and a damaged flashing transition are different issues and may need different repair approaches.
After a storm, inspect from the ground where practical and avoid climbing onto a roof or unstable surface. If a panel is displaced, a fastener line is damaged, or water is entering, contact a qualified contractor to assess the area. A visible symptom can originate in a panel, flashing, framing, or drainage condition, so identify the cause before covering it.
What should you include in a siding quote comparison?
A panel quote is easier to evaluate when it identifies materials, interfaces, and responsibility. Two proposals can use similar panel names yet differ in finish, trim, openings, installation, and exclusions. Request enough detail to compare the actual scope.
- Panel identification:
Record profile, material specification, finish, color, and any thickness or gauge information specified by the supplier.
- Attachment system:
Identify fasteners or clips, washers, support requirements, and the installation method.
- Edges and transitions:
Confirm which corner trim, closures, flashing, eave and rake details, and base conditions are included.
- Opening scope:
List overhead doors, walk doors, windows, vents, and other penetrations, including who supplies frames and who completes the surrounding detail.
- Building design:
Clarify how engineering, structural requirements, and applicable local reviews are addressed.
- Site and foundation:
State what site preparation, grading, concrete, and drainage work is included or separate.
- Envelope and interior:
Identify insulation, interior framing or liner, ventilation, and finish-out as included, excluded, or undecided.
- Product documents:
Request applicable product instructions, finish and warranty information, and care guidance.
- Owner responsibilities:
Write down what the owner must provide, such as site access, utility information, final selections, or separate work.
When comparing a quote, normalize the questions before comparing the bottom line. If one proposal includes flashing around every opening and another excludes it, they are not equivalent scopes. If one includes a slab and another begins with a prepared foundation, the difference is even larger. Mark each item as included, excluded, allowance, or awaiting confirmation.
Price is quote-based and depends on size, location, engineering, site conditions, materials, finishes, and scope. Treat early planning figures as guidance, not as a fixed offer. Construction duration also varies with building size, scope, weather, site readiness, and approvals. A clear scope helps owners see what needs a decision before final pricing and scheduling can be established.
How does siding fit into a coordinated building project?
Wall panels are installed after key decisions about site, foundation, frame, openings, and envelope have been coordinated. When different parties handle each portion, the owner may need to track handoffs: whether the slab is at the right elevation, whether framing matches openings, whether penetrations are known, and whether the panel delivery fits the installation sequence.
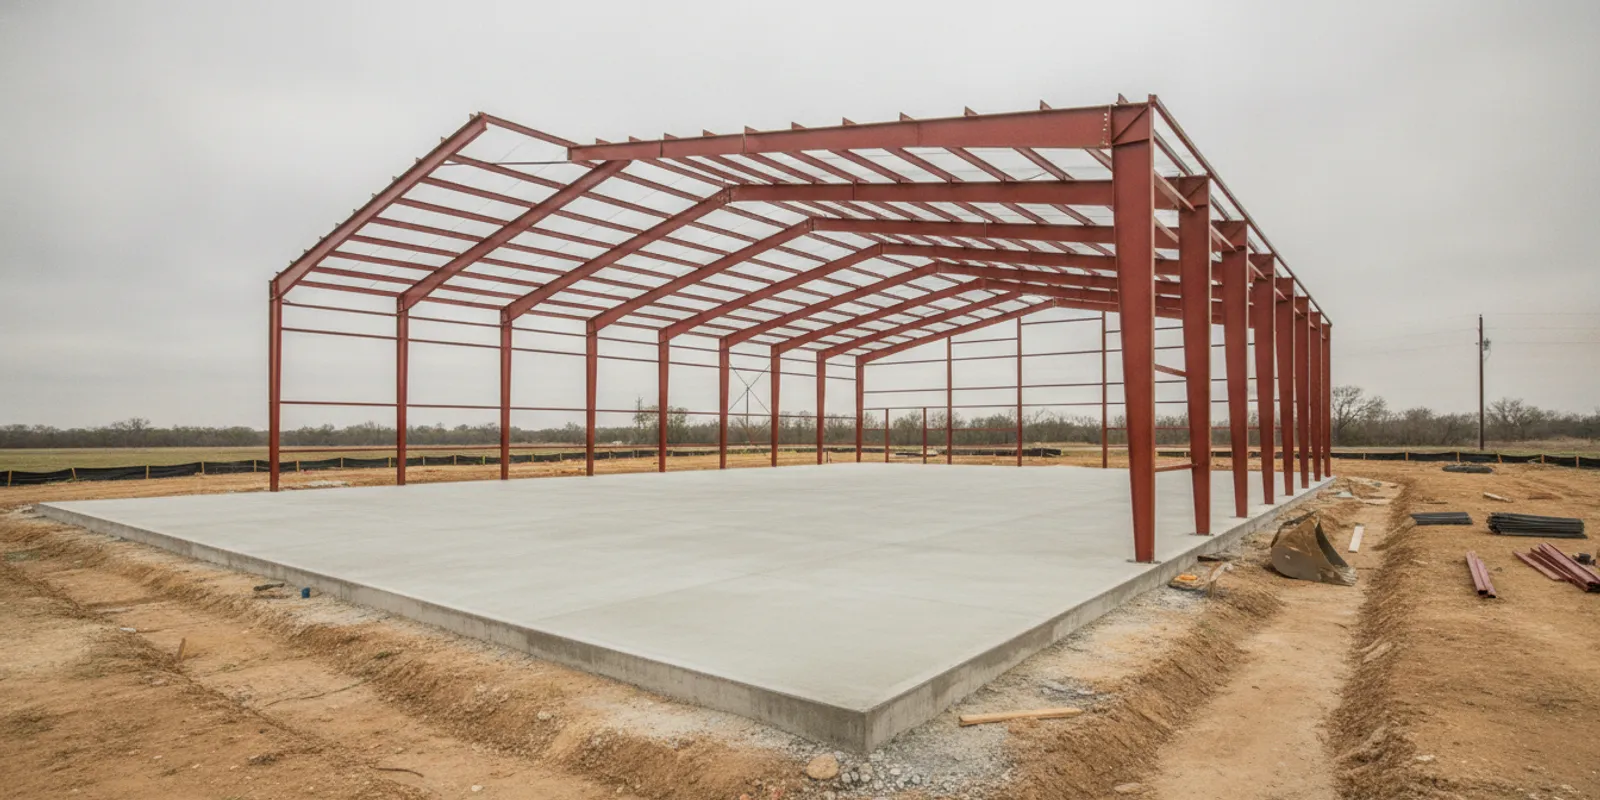
A turnkey approach brings those questions into one project conversation. Metal Buildings of Texas is a Texas-based, builder-led turnkey contractor. Its delivery scope can coordinate design, engineering, site preparation, concrete, red-iron steel erection, the building envelope, and optional finish-out. The exact scope depends on the project and location. Turnkey availability is concentrated within a 90-minute radius of Livingston; shell or installation coverage may extend farther, so confirm what is available for the site.
For a project discussion, prepare a site address or general location, intended workshop use, approximate dimensions, desired openings, conditioning plans, and any known site constraints. A few clear photos and a rough layout can help frame the early conversation. Do not treat a visualization or preliminary layout as an engineered plan. The building services overview and service area information explain the broad scope and coverage to discuss.
What changes for agricultural, commercial, or industrial workshops?
The same selection method applies across building types, but the priorities change with operations. A property owner should explain not just what the building looks like, but what happens around each wall.
What should a farm or ranch workshop owner consider?
Equipment access, mud, dust, feed or material storage, and frequent movement may shape the panel layout and wall protection conversation. Note where tractors and trailers turn, whether doors stay open for long periods, and which sides receive runoff or prevailing weather. If tools or supplies are stored against a wall, keep access to the cladding and drainage details in mind.
For a building used alongside barns or equipment storage, compare the workshop’s appearance with existing structures without assuming every elevation needs the same treatment. A quieter finish may make the building blend into the site, while a contrasting front can help identify a work entrance. Either way, sample finishes on site and coordinate roof and trim choices.
What should a commercial workshop plan address?
For a business, the building envelope should fit operating needs and the customer-facing image. Consider vehicle circulation, delivery routes, signs or lighting supports, security needs, and future changes in tenant or business use. Plan penetrations and attachments before installation, and confirm who coordinates any equipment mounted to the wall.
If the workshop is part of a larger facility, siding decisions should align with adjacent buildings and the overall site plan. Ask whether the proposed finish and panel system are available in the needed quantity and whether future additions can be coordinated with the original material. The proposal should explain interfaces between building, sitework, doors, and any separate trades.
What should an industrial operator clarify?
Industrial uses can include equipment, processes, or airborne materials that affect the wall environment. Identify any chemical exposure, exhaust, washdown, heat, or repeated impact that could contact the siding. Do not assume an ordinary finish is suitable for every process. Ask the manufacturer and design team to review the actual exposure and requirements.
Also distinguish wall cladding from structural capacity. The panel is not a substitute for structural framing or for a planned support for heavy equipment. If equipment, racks, pipes, or other components will be attached to a wall, identify the loads and connection needs during design. Changes after installation may require added framing or a revised detail.
When should you choose and order the panel system?
Make the selection early enough to coordinate it, but not in isolation from the rest of the design. The exact sequence depends on the project, supplier, and approvals. A practical workflow can help ensure that decisions arrive in a useful order.
- Set the building brief.
Document use, dimensions, location, access, interior conditions, appearance goals, and likely future changes.
- Map the site and elevations.
Identify drainage paths, grades, roof runoff, openings, utilities, adjacent structures, and wall exposure.
- Confirm design inputs.
Coordinate structural design and applicable local requirements with the project team. Treat wind criteria, soils, permitting, and drainage as site- and jurisdiction-specific.
- Shortlist profile systems.
Compare exposed-fastener and concealed-fastener choices using actual product information, installation requirements, appearance, and repair considerations.
- Select finish and color.
Review documentation and warranty terms, then compare physical samples in outdoor light with roof, trim, and door finishes.
- Coordinate details.
Review corners, bases, openings, roof edges, penetrations, panel direction, and the insulation or interior plan.
- Check the written scope.
Ensure quote documents identify materials, accessories, installation, exclusions, and responsibility for approvals and site preparation.
- Approve the coordinated package.
Resolve outstanding questions before materials are ordered or details become difficult to change. Keep the final product records for maintenance.
This sequence is a planning aid, not a universal construction schedule. Some projects require design or permit information before finish selections can be finalized; others may need early product confirmation because of availability. Ask the project team what must be decided first and what can remain flexible.
What questions should you ask before approving the siding?
Use a final review conversation to catch missing information before the materials are ordered. The objective is not to collect a pile of product names; it is to understand how the selected wall system fits the building.
What exact panel and finish are proposed, and how do they fit the intended use and exposure?
What manufacturer information covers installation, cleaning, repair, and warranty conditions?
How are corners, eaves, rakes, openings, wall bases, and penetrations detailed?
How do slab elevation, finished grade, and drainage relate to the siding termination?
What structural design and local approval requirements apply, and who coordinates them?
What is included in the quote, and what work or materials remain separate?
How are insulation, ventilation, and interior finish handled if the workshop will be conditioned?
What is the process for a repair, and can matching material be identified later?
What future openings or additions should be planned for now?
How do you choose metal siding panels for a Texas workshop?
Start with the workshop’s use, site exposure, and operating needs. Compare exposed- and concealed-fastener systems by their complete installation and repair requirements, then verify the finish, color, openings, drainage details, and any insulation plan. Confirm structural design and local approvals for the actual site, and compare written scopes before materials are finalized. A coordinated building plan makes the siding one part of a complete, practical steel workshop.
Comments